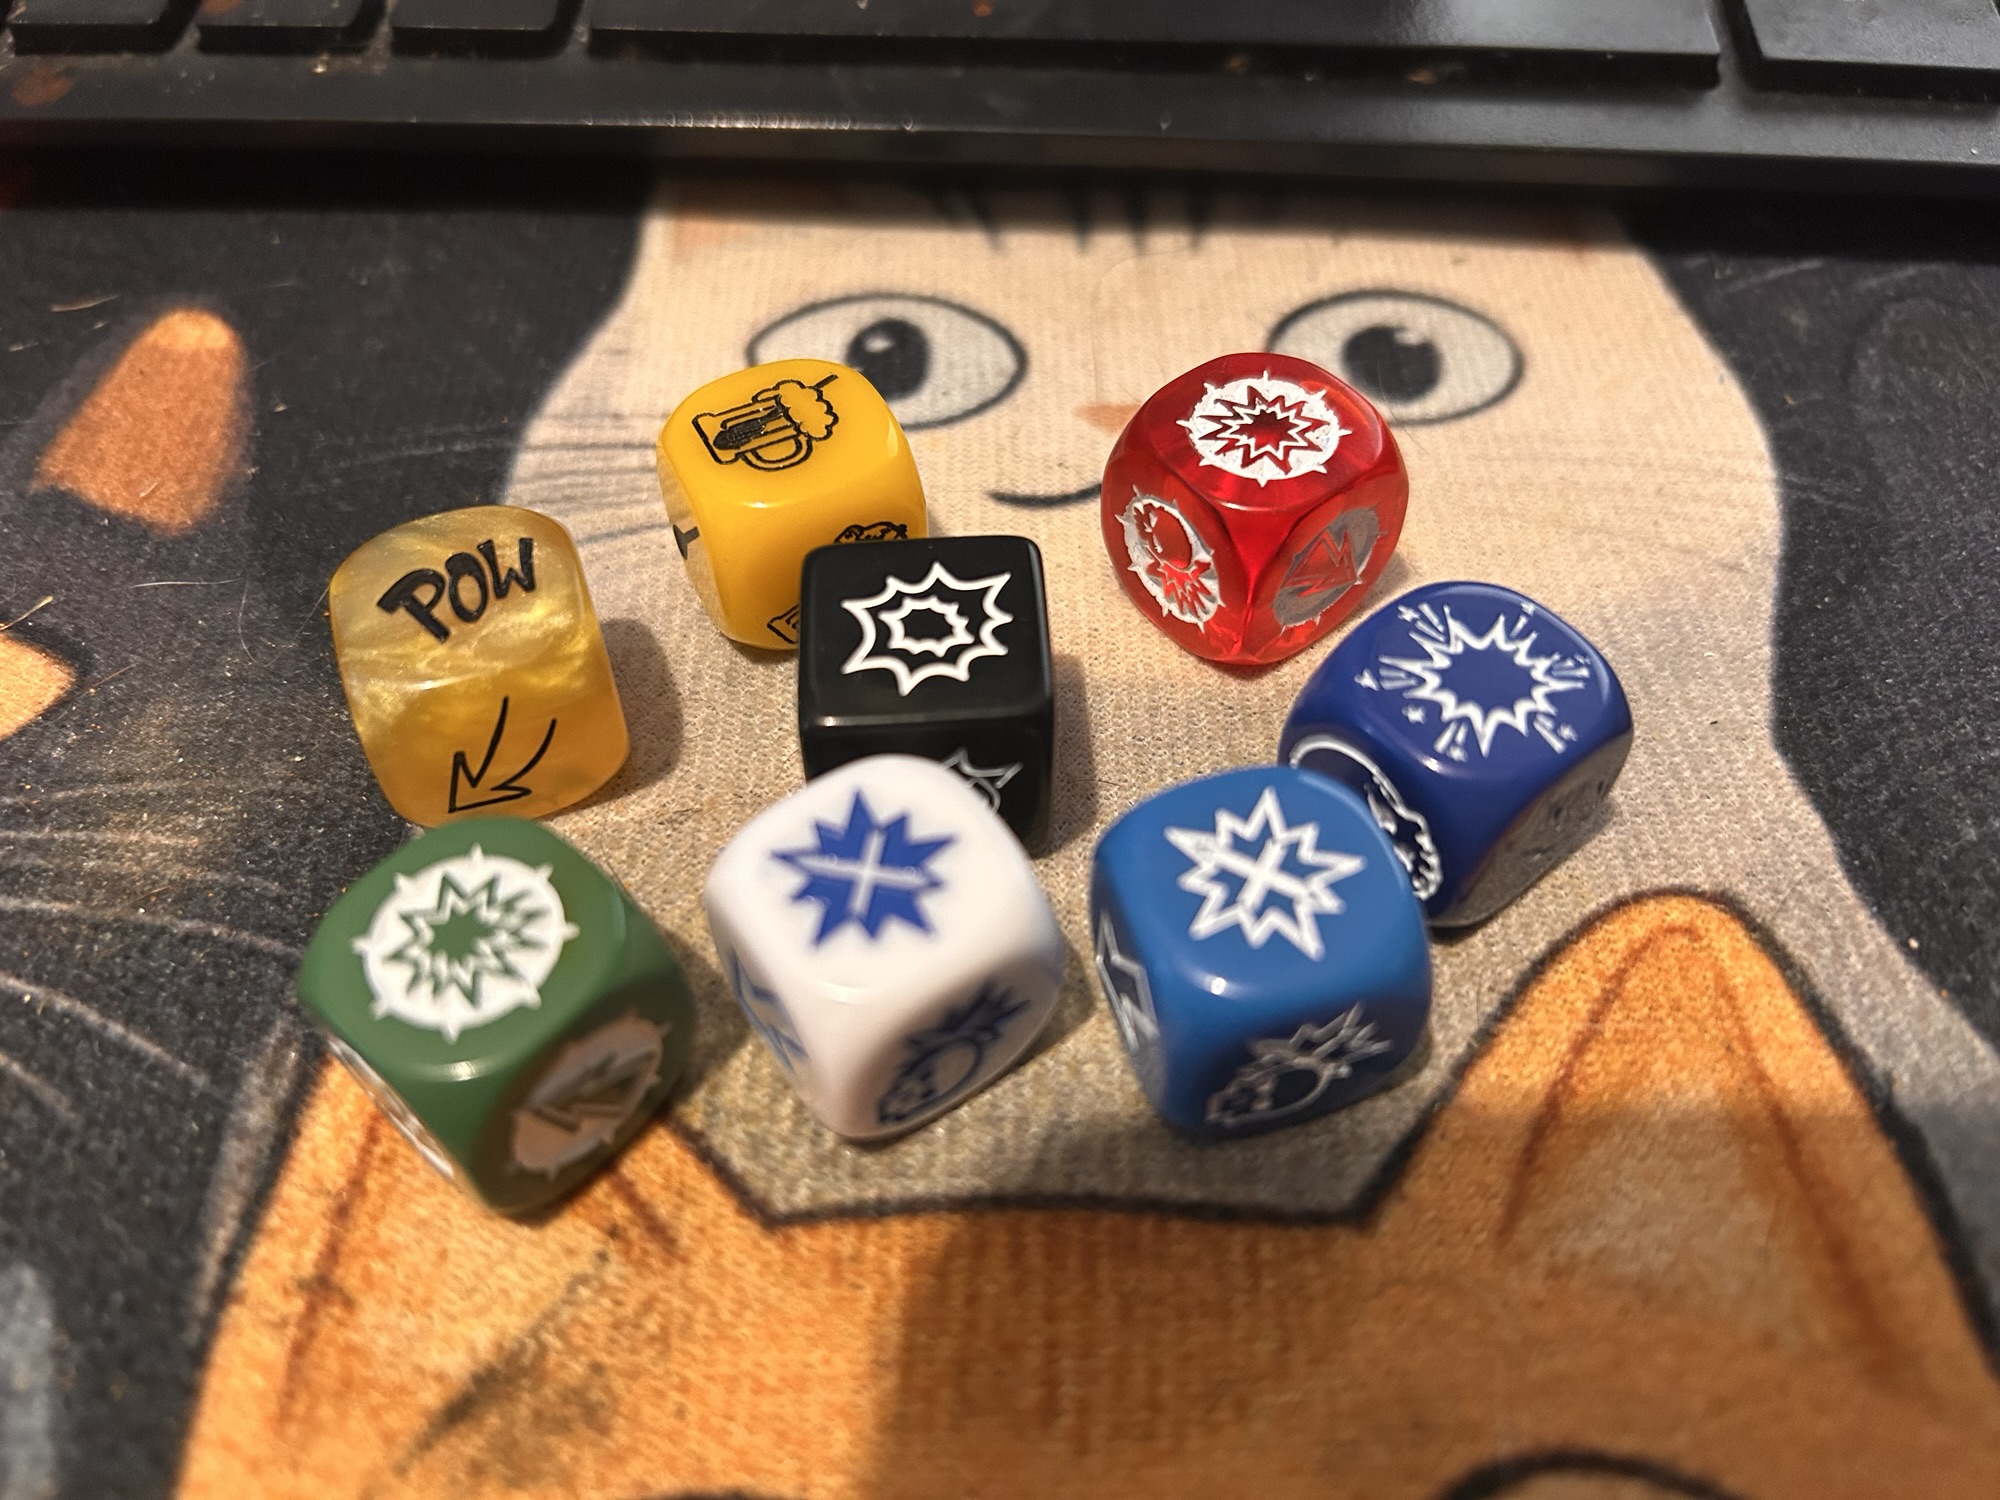

Blocking core game mechanic of Blood Bowl. Its also one of the areas that takes a little longer to completely grasp at first.
Blocking almost always plays a central role in achieving your team’s win condition. All teams block to create space, reposition, and protect the ball, and to get the ball off their opponents, while blocking can also be a means-to-an-end in a kill-based strategy.
This post goes from the very basics of the dice outcomes and assists through to the odds for success and failure. If you already know everything about how the dice/assists work, you can jump to the stats via this button or the next post discusses the skills that change the blocking dynamic.

Blocking Basics… Dice Outcomes Explained
- Skull = Attacker Down. This also causes a Turnover. Bad News.
- Skull+Pow = Both Down= Both players get knocked down unless they have Block. If the attacking player is knocked down this causes a Turnover. If either player has Wrestle, they can choose to use it, in which case both players are placed prone (no armour roll). This also doesn’t cause a Turnover unless the attacker is carrying the ball.
- Arrows = Push back. Attacker chooses which of the three squares they can be pushed toward. There are two arrow sides on the block dice.
- Pow+Exclamation mark = Defender Stumbles, defender gets knocked down unless they have the Dodge skill. If the attacker has Tackle it cancels Dodge.
- Pow = Defender get Knocked Down. Huzzah.
Once you have resolved the dice the attacker decides whether they will follow up or not, then they roll to break armour and, if broken, to determine the severity of the injury.
Video below explains the core blocking skills:

Blocking as an action is one of the few that you can shift the odds of success dramatically through the positioning of your pieces. There is a big difference between rolling 1 dice and hoping for a Pow and rolling 2 or 3. Being allowed to roll more dice can come from having a higher Strength characteristic or from the help of friends, aka assists.
An important thing to learn early is how to “see” blocks and assists, who can assist whom, and, therefore, how many dice would be rolled. It is all explained in the rule book but does take some practice when you are first starting out.
It’s easy when players are spaced out. All you need to do is compare the two combatants Strength characteristics; if they equal, then roll 1D, if attacker is up to double the defender, roll 2D and the attacker picks, if attacker is less than the defender by up to half, then roll 2D and defender picks (written hereafter as -2D, but also referred to as “uphill” or “half-dice”), if more or less than double then it changes to 3D or -3D.
The video below explains the core concepts or scroll down for diagrammatic versions.

Then assists come in. For any attacking player who is touching the target, but who is not in the TZ of any other defending piece, you can add +1 to the attacker strength. For any defensive player who is touching the attacking piece but not in any other attackers’ TZs you add +1 to the defender’s strength.

Assists can be from any angle. In the picture below. The Wight could hit the Line Orc and claim the Ghoul’s assist, and similarly if the Line Orc tried to hit either of the Ghoul or the Wight, the other piece could provide a defensive assist.

Unless they have the Guard skill (covered in a later post) a player that is in another piece’s Tackle Zone (TZ) can not provide an assist. Essentially putting them into a TZ effectively turns off their ability to help out.
In this final example, the Wight in now in the Troll’s and the Line Orc’s TZ, but the Troll is also in the Mummy’s TZ. However, the Ghoul and the Big ‘Un on the ends are both only in the Line Orc and Mummy’s TZs respectively.

From this position, the Wight could hit the Line Orc and claim the Ghoul’s assist (2D), but the Ghoul couldn’t claim the Wight’s assist. Similarly, the Troll could hit the Mummy with the Big ‘Un’s assist, but the Big ‘Un couldn’t claim the Troll’s assist if he wanted to hit the Mummy.
We’ll cover other relevant skills in a separate post. If players are “Distracted” and lost their TZ, or “Gouged” via the Eye Gouge action, they don’t contribute to offensive or defensive assists.
Test your understanding with this scenario – Quiz!
You should be able to look at every possible block along the line for both teams here and work out how many dice would be thrown. I’ve made this in diagrammatic form below so you don’t need to identify the minis!
See how you get on with the quiz, and then it is explained below.


Explanation
On the left, the first Line Orc only gets one dice on the Ghoul, as all the other pieces are in the TZ of the Mummy. In contrast, if the middle Line Orc, or end Blitzer (Block) hits the Ghoul, the Line Orc on the far left can lend his assist as he is not in any TZs other than the Ghoul, so they both get 2D.

If you flip that over, the Undead position is the reverse. The Ghoul gets 1D on the left Orc Lino as the other two Orcs can’t assist, but if the Ghoul hits the middle or right Orc it would be -2D owing to the left Orc’s assist. The Mummy always gets 2D as he is S5 and there are no offensive or defensive assists (everyone else is touched by the Ghoul).
In the scrum on the right almost everyone is in more than one TZ except the stripey pants Line Orc on the far left. Therefore the Blitzer (Block band) can hit diagonally North West and claim and assist from that Lino.

Don’t worry if you found this tricky, it become easy, and very quick to do with a bit of practice.
Seeing two moves ahead:
The next layer in your learning is picturing the situation after the blocks have been thrown, and the results have changed the position.
For example, if Big ‘Un #6 hits Wight E for 2D and pushes him away, then Blitzer #5 would be able to hit Zombie D with 2D rather than 1D.
Or, the Big ‘Un could hit the Wight away and the Blitzer could hit the other Wight (C) away, if they both worked, then the Troll could claim assists from both #6 and #5 to hit Zombie D. That would take the Troll from S5 +2 to S7, so they would now be more than double the Zombie’s Strength and get 3D instead of 2D.


Each block carries risk and reward. In the table below we’ve broken down the outcomes into 3 categories.
- Attacker Down: Any result that leaves the attacker on the ground. A Skull, or a Both Down result where the blocking piece does not have the Block skill. You need to know the likelihood of this happening in different scenarios as it could mean your player gets hurt and (more importantly) causes a Turnover, it is the risk in your risk/reward equation.
- Push or Better: This column represents results that are safe. A Push might or might not be good enough in context, but it doesn’t end the turn.
- Defender Down (without the attacker down). Either Pow or Defender Stumbles when your opponent doesn’t have Dodge or you have Tackle, or Both Down where you have Block but your opponent doesn’t. You need this stat to make decisions about where holes will be in the defence and to compare different scenarios for taking down the ball carrier.
Knowing the odds of each outcome helps you decide which order to do things to have the balance of risk vs reward in your favour. When to smack and when to hold back. They also inform you as to whether a RR is likely to be needed and/or justified.

The whole table is a lot to absorb in one go. However, some of these dice rolls are much more common than others. Here are a list of things we think worth remembering as they help your decision making.
- A 2D block without Block is 1/9 to lead to attacker down and turnover (or to need a RR). Compare that to 1/36 when you block with Block; 4x less likely to go wrong. So, whenever you are about to start hitting remember, “Blockless blocks are quite risky”.
- A 3D block without Block is 3x less likely to lead to attacker down compared with 2D: give your Big Guy some help! Usually a S5 Big Guy only needs two assists to reach >2x a regular S3 piece’s Strength.
- A -2D (uphill) block with Block against a blockless opponent is 69% to get a Push or better. This is likely better than you perceive when first playing. Uphill blocks can be good for getting out of tight situations when dodging isn’t very appealing. Note that an Ag3+ player will dodge into the open successfully 67% of the time, so an uphill block with block has a very similar risk profile and could cause knockdown your opponent.
Now we’ve gone through the odds, let’s look at the same scenario as we looked at before and use the odds to rank the blocks in order of:
a) Least likely to cause a turnover (attacker down)
b) Most likely to get the player down without a turnover (defender down).

Next post – Block Relevant Skills
All Blood Bowl Basics Posts to Date:

Enjoyed this? Found it useful?
This is part of an expanding series, come back next week for the next installment.
The text here originally came from our book – Blood Bowl Strategy: Third Season Unofficial Strategy Guide — I’ve made some edits to make it more suitable for online posts. The book is a complete guide to positioning, tempo, drive planning, defensive structures, offensive patterns, league development, inducements, and tournament preparation. 266 pages, ~74,000 words of our collective wisdom designed to take you from a beginner to a >50% win rate coach.
We will be posting excerpts from the book over the coming months – you can subscribe to the blog to receive notifications and the next basics post straight to your inbox.
Physical copies of the book are available on Amazon (check your own country’s listing – e.g. amazon.co.uk here). Or I usually have a box of books with me at UK tournament events. Or message me if you want to buy a batch.
Digital copies of the PDF are available via the button below:


Leave a Reply