
This is the first article in our Blood Bowl Basics Series. It covers the foundational ideas that shape your risk profile, your reroll usage, and how you structure your team. These principles apply to every roster, every format, and every skill level, and mastering them is a route to improving your play.
The plan for the series is to have weekly posts aimed initially at newer players but becoming more advanced as we go.
Today, we’re talking about core concepts. The buttons below will jump to these points in this page.

Core Concept 1: Risk vs reward
Blood Bowl is a positioning and puzzle game built upon a foundation of risk management. Almost every action you take involves a dice roll, and with that comes the possibility of failure, usually ending your turn.
The game is therefore filled with mini decisions where a failure doing something you choose to do early in the turn might stop you from doing what you need to do later.
Winning the game depends on making informed decisions, knowing the odds of different outcomes and balancing those probabilities against understanding what you’re risking (the fail state) versus what you’re trying to gain (the reward). A failed dodge might cost you a scoring opportunity; a failed block might expose your ball carrier; these are clearly obvious high visibility if/then statements but every dice roll contributes to the overall game outcome.
A big driver in your early improvement is learning to weigh the reward against the risk, and to make decisions that reflect the current board state, your available resources, and your broader game plan. Skills, rerolls, and positioning change the risk profile, and influence the order in which you take actions.
Turn ordering, the sequence in which you activate your players, is about protecting your drive from collapsing even if the turn ends prematurely.
A Word on Probability (Don’t Panic)
Before we dive into the mechanics, a quick heads-up: we’re going to talk about probability. But don’t worry, this isn’t a maths exam. The good news is that almost every roll in Blood Bowl involves one or more standard six-sided dice (D6), and once you get the hang of the odds, they become second nature.
There are four key things to keep in mind:
Know your odds.
Whether you prefer fractions or percentages, it’s worth getting comfortable with the likelihood of success and failure. Understanding the odds helps you make informed choices which leads to smarter plays.
There is a difference between knowing the odds and being a slave to them. Sometimes a low probability play is the best play. The reward is worth the risk. But the route to becoming a better player is using all the information available to you to make your decisions.
Most of the time your knowledge of the odds doesn’t need too much precision. We don’t need to be thinking “It’s 55.55556% to work”. We do, of course, want to extract every percentage point of advantage where we can, but the comparisons we are making almost always have more than just the dice roll involved: the effect of the decision and the resulting roll is a change in positioning (“the board state”). Therefore, it is usually good enough to just have a feel for the outcomes in terms of their relative risk/reward.
As you get more comfortable with the stats, you will look to optimise every action but those will be micro-improvements to your win rate compared with getting the fundamentals sorted.
Probability is not prediction.
Just because something has a low chance of success doesn’t mean it won’t happen, and just because something is likely to be fine doesn’t mean it’s guaranteed. Dice are fickle. You’ll see 1s when you least expect or want them, and sometimes that 6+ dodge/catch/pass combo will come off like magic.
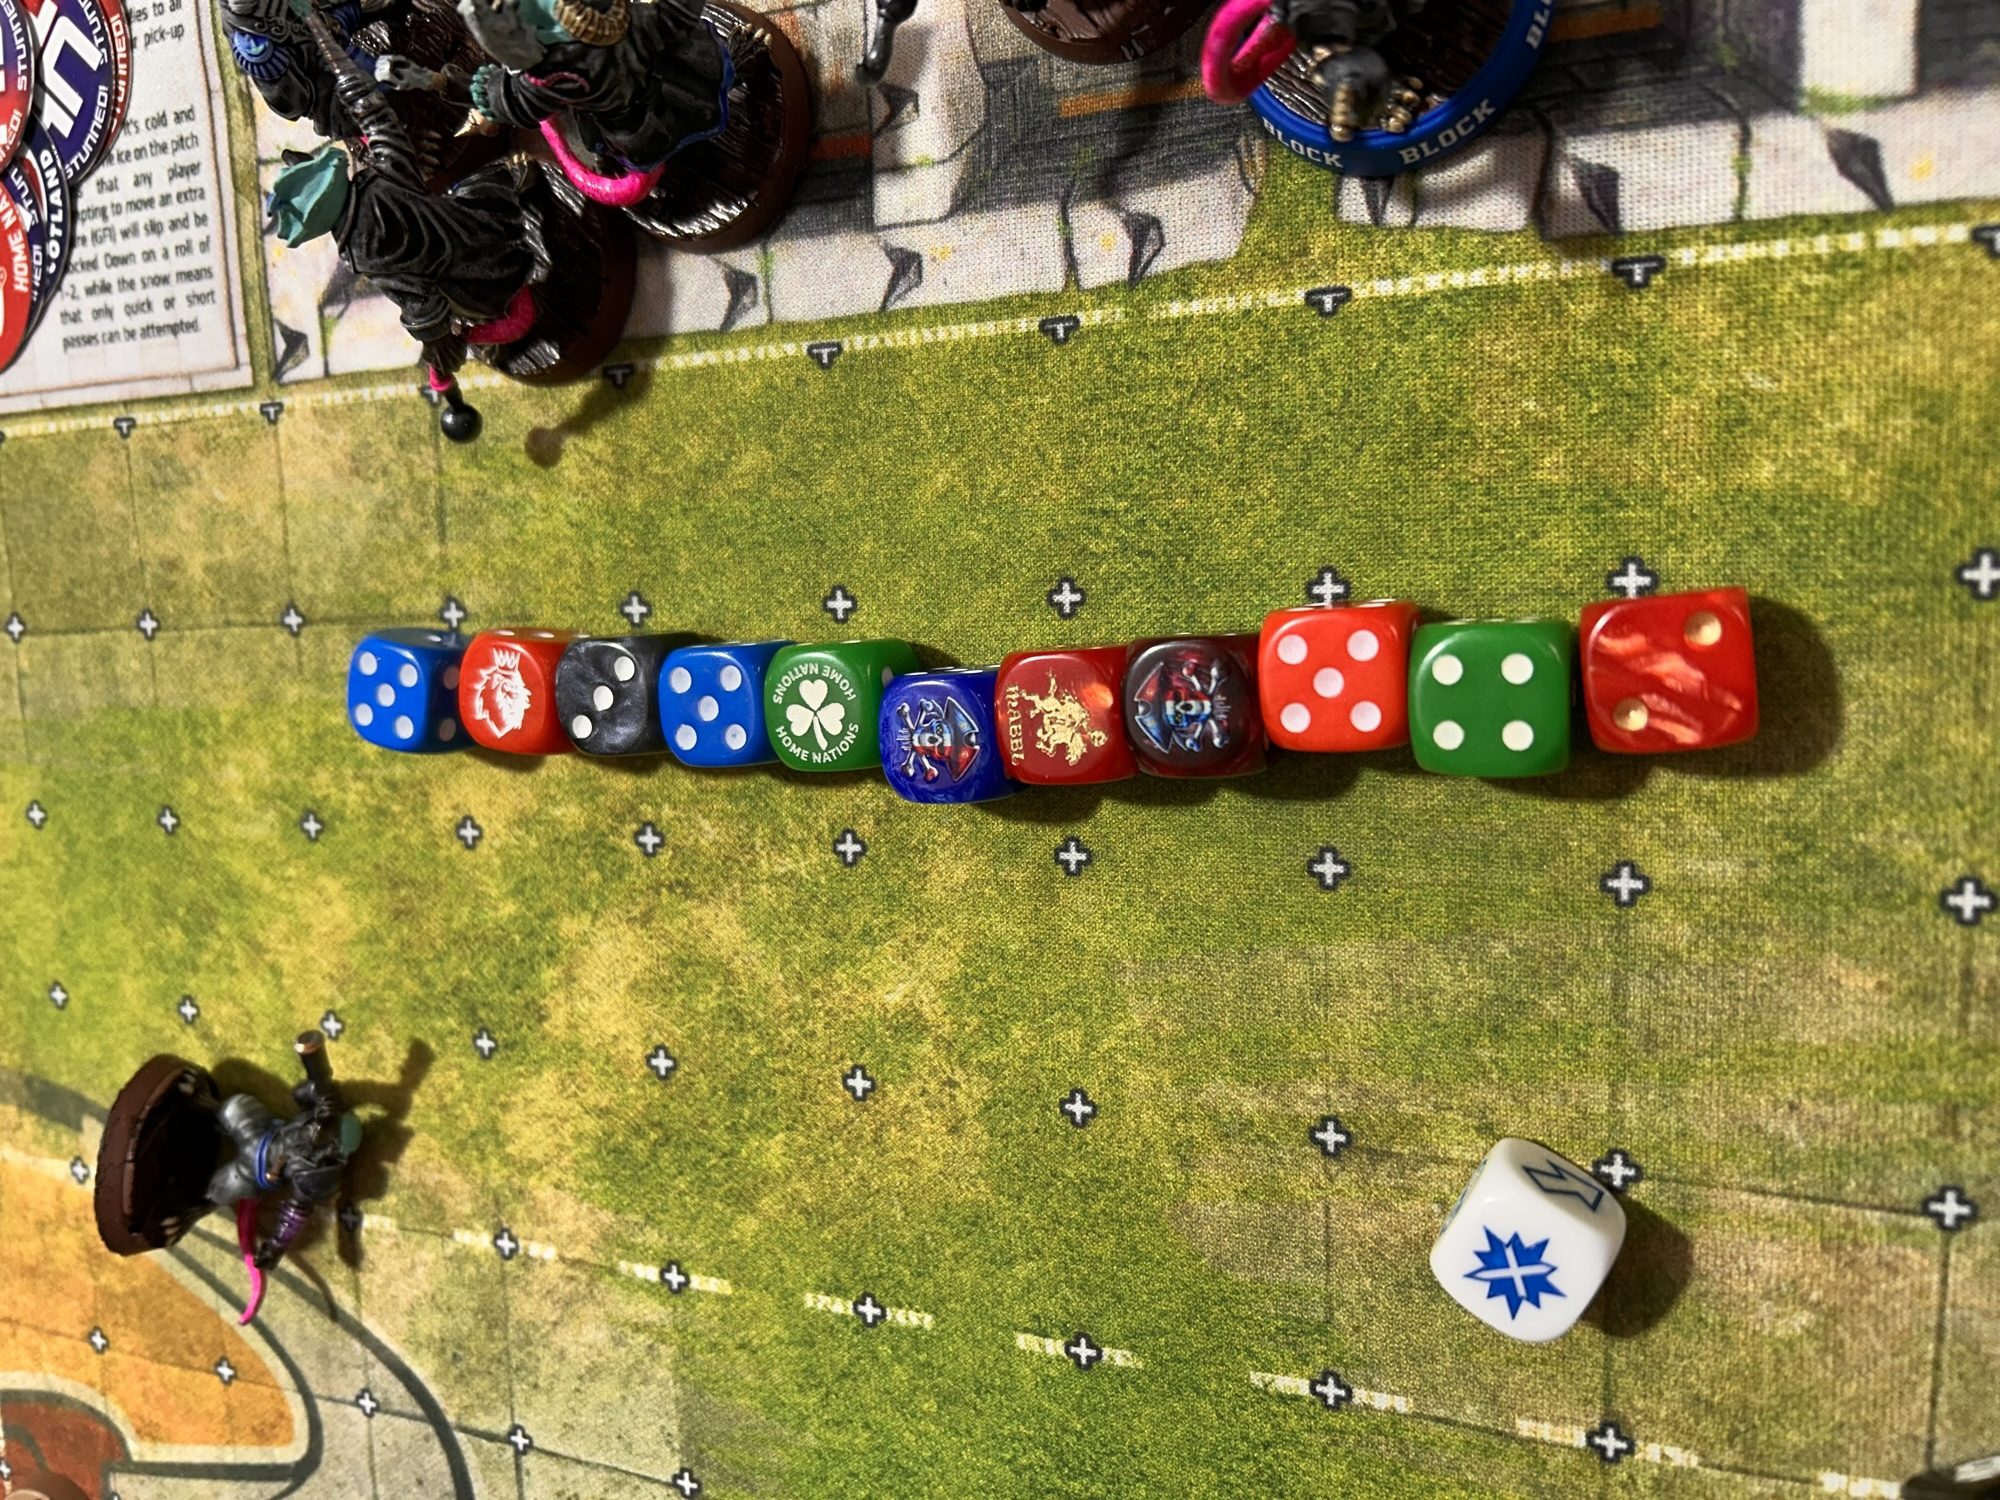
Over many games, the curve will even out, but in the moment of any individual dice roll, anything can happen. Everybody has rolled triple Pows, or more memorably, triple Skulls at some point. [The dice sequence above was one magical turn in a game in the England Inter-Series Cup].
Every dice is independent, but risk is cumulative.
very roll is its own event. That means the odds of a roll succeeding don’t change based on what happened before. A failed dodge doesn’t make the next dodge “due.” A lucky streak doesn’t make a failure more likely.
Before you do a series of actions you should consider the whole sequence and options; if option 1 has 3 dodges, 2 rushes and a 2D block and option 2 has 1 hard dodge, 4 rushes for a 1D block, it is the cumulative risk of the whole sequence that matters before you decide what to do. However, each dice roll is independent and should be seen as such.
Halfway through a sequence of rolls you should forget every dice rolled to that point, and look instead only at the remaining roll or set of rolls. The odds change as the turn progresses. This is important when you come to decide whether to re-roll a dice. That re-roll decision should always be based on the dice still to come rather than on the original sequence.
Independent dice = independent decisions. Treat every roll as if it’s the first roll of the turn.
A lot of these points will come up again and again!
Do something.
A lot of players suffer from “analysis paralysis”, which makes it hard for them to make decisions. If you find yourself in a decision loop remember that usually the difference between the optimal action and the other 10 options available isn’t likely to be much. Different players would solve the puzzle in different ways, and there usually isn’t a definitively right or wrong answer.
Can’t decide? Go with your gut (and then discuss the decision afterward).

Core Concept 2: Plan for the Worst, Play for the Best
When most people start playing the game, their innate tendency is to focus on the up-side of the play. If I punch this guy, he might suffer an injury. However, focusing on the reward will leave you vulnerable to the risk.
To progress more quickly, we recommend actively focusing first on the fail state. Make it part of your pre-roll routine.
This is not to make you conservative in your choices, but because if you don’t think about the risk you are more likely to miss the easy risk-free ways to mitigate failure.
Before you roll any dice, ask: what happens if this goes wrong?
Example
Ball pick-ups are a good example. If your ball carrier is standing within range of opposing players, you maybe can’t directly change the odds of the pick-up roll, but you can change the consequences.
Putting players between the ball and the opposition before the pick‑up doesn’t change the odds of the pick‑up roll, it only changes what happens if you fail. This sort of mitigation makes it so that bad luck doesn’t break your position entirely.
Once you have identified the fail state, it’s then time to plan for the success state. Sometimes you just have to roll the dice and take the chance. Identifying that pivot point between being risk averse and being willing to take the lower odds option available to you is one of the hardest things to master in the game.

Core Concept 3: Safe Moves First
If I didn’t have this section in this post, there would be outrage.
The classic advice every experienced player will tell you is “Safe Moves First”. This is the natural extension to planning for the worst.
Everyone will say this when you start. And they will say it again, when you inevitably forget and are punished with an early double Skulls. They’ll also say it when commentating on your matches at the World Championship, when the pressure has got to you.
It is always tempting to dive straight into the exciting stuff, blitzes, blocks and surfs, but skipping the simple repositioning can leave you exposed. Big advice, if it is your offence, also ask “is the ball safe” and make safe moves to improve that safety.
For example, if you’ve got players in a wide zone away from the action and aren’t contributing to your position, shifting those players toward the ball or to a more opportune position might not need any dice. If you wait until after a risky block to move them and the block fails, you’ve lost the chance entirely.
As a new player it is worth getting into the habit of standing up prone players at the start of the turn; this builds discipline and ensures they are on their feet in case of early turnovers. With experience, you’ll learn when that habit becomes a choice; sometimes leaving a player down or delaying a move is tactically sound, we’ll come back to this later. The key is knowing why you’re doing it.
The “safe moves first” concept does evolve into “safe moves sometimes” over time. Well, not exactly that, but turn ordering is about balancing safety, impact, and risk. Sometimes the optimal location of a piece that is free to move depends on the outcome of an earlier action. You will hate it when that first action fails and you don’t get to make the safe move, I certainly still do. But as you improve as a player, you’ll learn to weigh those trade-offs and that’s when Blood Bowl changes from being a dice game to being a strategy game with dice.

Core Concept 4: Team Reroll Strategy
Team rerolls (RRs) are one of the most valuable resources available to you. Their usage can define your win percentage.
Newer players often burn rerolls on early failures that experienced coaches would simply accept (“eat”). It’s understandable, watching a block or dodge fail can feel like the game is slipping away. But RRs are a finite resource, and their true value often lies in the next moment, not the current one. General advice to new(er) players is to start by using team rerolls for actions in and around the ball carrier and aim to keep at least one in hand for the later turns of a half if at all possible.
Once you’ve played a few games you will quickly realise that on offence, you’ll almost always face a decisive roll near the end of your drive: whether it’s a handoff, a dodge or a rush into the end zone (beware goal-line tripwires). Having a RR in hand can be the difference between scoring and turning over.
On defence, the need is more situational, but the same principle applies: whether a RR is needed depends on how intact your screen is and what you’re giving up by failing; space, blocks, tempo…or not much? Learning when to eat a failed roll is part of becoming a more strategic coach.
Decide before you roll whether the action warrants using a team RR
That’s all fine general advice but I want to take an aside to make a point that is really important. Good RR management starts before you roll the dice.
A reroll changes probability depending on when you commit to it. If you decide before rolling that you will reroll a failure, a 3+ roll succeeds 8 times out of 9. But if you decide after seeing the failure, you are only thinking about the next roll, every dice is independent. The next roll succeeds 2 times out of 3. Both numbers are correct; they just describe different decision frames. The first is the probability of the whole action. The second is the probability of the reroll itself.
Before rolling anything, ask yourself: “If this fails, will I need to reroll it?”, if yes, then ask “Do I have enough rerolls to afford to reroll it?” Finally, ask “Do I really need to do this action, or is something else available”. If the answer to all these questions is yes, then you need to commit and accept that you might need a RR. However, there are many game states where choosing not to do an action might be better. Pausing before you roll the dice is the last chance to make those extra safe moves that you should have made earlier.
I recommend internally or externally saying “I will RR this if it fails” or “I won’t RR this if it fails” for any dice roll. This will train into always assessing the importance of the roll.
Although I am a strong advocate for deciding before you roll, you should ALSO re-evaluate once you have rolled and see the outcome, ask yourself again; “Is this failure survivable?” and “Will I need that RR for a more critical action later in the drive?”.
Referring to our previous concept, it is important that you know the odds when making this decision. A RR on a 2+ might have a different risk-to-value proposition from using a RR on a 5+. Understanding probability helps you decide when a RR is a tactical investment, and when it’s just wishful thinking.
OK, back to considering what is worth rerolling. There are two common exceptions to the general priority concepts introduced earlier.
First, you need to consider who is involved. If it is your star Wardancer that is about to take an armour roll and then a foul is likely coming soon after, then that might shift your RR calculations. Sometimes, rarely, RRs can also be about greed. You might finally have got a shot at their key player (with your Mighty Blow and Tackle piece), taking the star out have a big enough effect that it could swing the game. Getting that chainsaw off the field on Turn 1 might save multiple of your pieces from being carted off on a stretcher. That rare opportunity might justify burning a reroll to improve your chance of winning.
Second, we need to consider the odds of the remaining sequence at the point when the RR would go in. I mentioned this earlier, but let’s explore an example. When we are looking at sequences of events together the equations shift after each roll, and it can become harder to work out the value vs risk proposition. As the sequence progresses, the odds of the potential positive outcome becomes more likely. For example, if you needed a 3+ dodge then two x 2+ rush rolls to get a 1D block on the ball carrier needing Pow or Defender Stumbles (33%)*, then the whole sequence together would have a 15% chance of success (67% x 83% x 83% x 33%). If you failed the initial dodge, then the odds of the sequence working is still 15% if you RR the dodge, as you still have all the other rolls to make, so maybe its not worth the risk? However, once the dodge was passed, the new odds of success become 23%, after the first rush passes it improves again to 27%, and after both rushes it reaches 33%. Faced with that sort of proposition, the later rolls might justify using a RR.
In these scenarios, before rolling any dice, i.e. before the dodge, you should decide what you would reroll…perhaps anything from the second rush onwards but not the first dodge if it fails. Obviously, everything depends on lots of other factors going on in the game as well, but the idea to take on board is to look at the remaining series of dice rolls at each stage when deciding.
*Don’t worry if these probabilities aren’t embedded yet, we’ll discuss them over coming posts.

Clearly, this had to be concept #5.
The rule of 5 is a framework that can be applied to lots of real-world situations to improve habit formation. Choose 5 high-leverage actions and do them every day to make steady progress toward a goal.*
So why mention it here? Well, one way to improve your early play is to adopt a pseudo rule-of-5 approach to dice rolls. Establish a habit of starting each turn by identifying the actions that will require a dice roll which can fail and then ordering those dice rolls such that you identify the top five most important rolls (Some turns might not need 5 rolls at all.) Important here is not the same as most likely to succeed/least likely to fail, but rather the ones that have the greatest value toward your goal for that part of the game. Establishing a habit of doing this will help you to prioritise and focus on drive or game success rather than looking at isolated actions and their consequences.
Rule of 5 part 2, specifically for BB, is appreciating that making fewer rolls is, very generally, a good thing. This is a massive oversimplification and only really refers to dodges, rushes, other agility actions, and to 1D or worse blocks. Indeed, we’ll discuss later how delivering more blocks is often a really good thing!
The thought process to take on board here is if you are routinely making many high-risk low-value dice rolls, then things aren’t going well! It could be that your opponent has you under pressure, but it could also be that it is your play style that means you either choose or are forced into taking extra actions that perhaps you could avoid. Tracking how many rolls you make could help you see whether this is something to work on**.
There will be times when you need to make lots of rolls. Also, the race and skills you are using matters: you could justify making 2+ dodges with dodge more often than 3+ without dodge. Some races just roll loads of dice. Vampires, Snotlings, and Ogres spring to mind! What you should look at is how frequently you have these sorts of multi-roll turns and what is your average turn like.
*The “Rule of 5” aligns with several well‑established habit‑formation principles. Research on keystone habits shows that a small number of high‑leverage behaviours can produce cascading improvements across multiple domains (ref). Studies on habit stacking and implementation intentions demonstrate that linking behaviours to daily cues dramatically increases adherence (ref). Neuroscience research on cognitive load shows that the brain can only encode a limited number of new habits at once, and that small, consistent routines outperform large multi‑habit attempts (ref).
**These data are readily available if you are playing online. Look at how many dodges, rushes, blocks and other optional rolls. Each race will have a different balance, and each game will be different but the trends will be informative. For example; are you making (on average) fewer rushes as you improve?
Next Posts (also available today)
Core Concepts (Part 2): Win Conditions, Best Chances, and Connecting Your Players.
If you want updates on the next post in the series sent straight to your email, you can sign up below.
What’s coming over the coming weeks?
The text from this post comes from Blood Bowl Season 3 Unofficial Strategy Guide, a 260+ page, 73,000 word book we wrote last year (and are regularly updating). You can buy the full physical book right now on your local Amazon.
What we’ll be doing in the Blood Bowl Basics Series is reproducing stand-alone content from that book and posting it here, possibly with some of the interactive features that lend themselves to web pages.
So, what’s to come?
To answer that it’s probably best to have a look at the book contents page (below). Although it won’t be exactly in that order, we’ll work through the blocking, fouling, dodging chapters early and see how things are going.



Leave a Reply