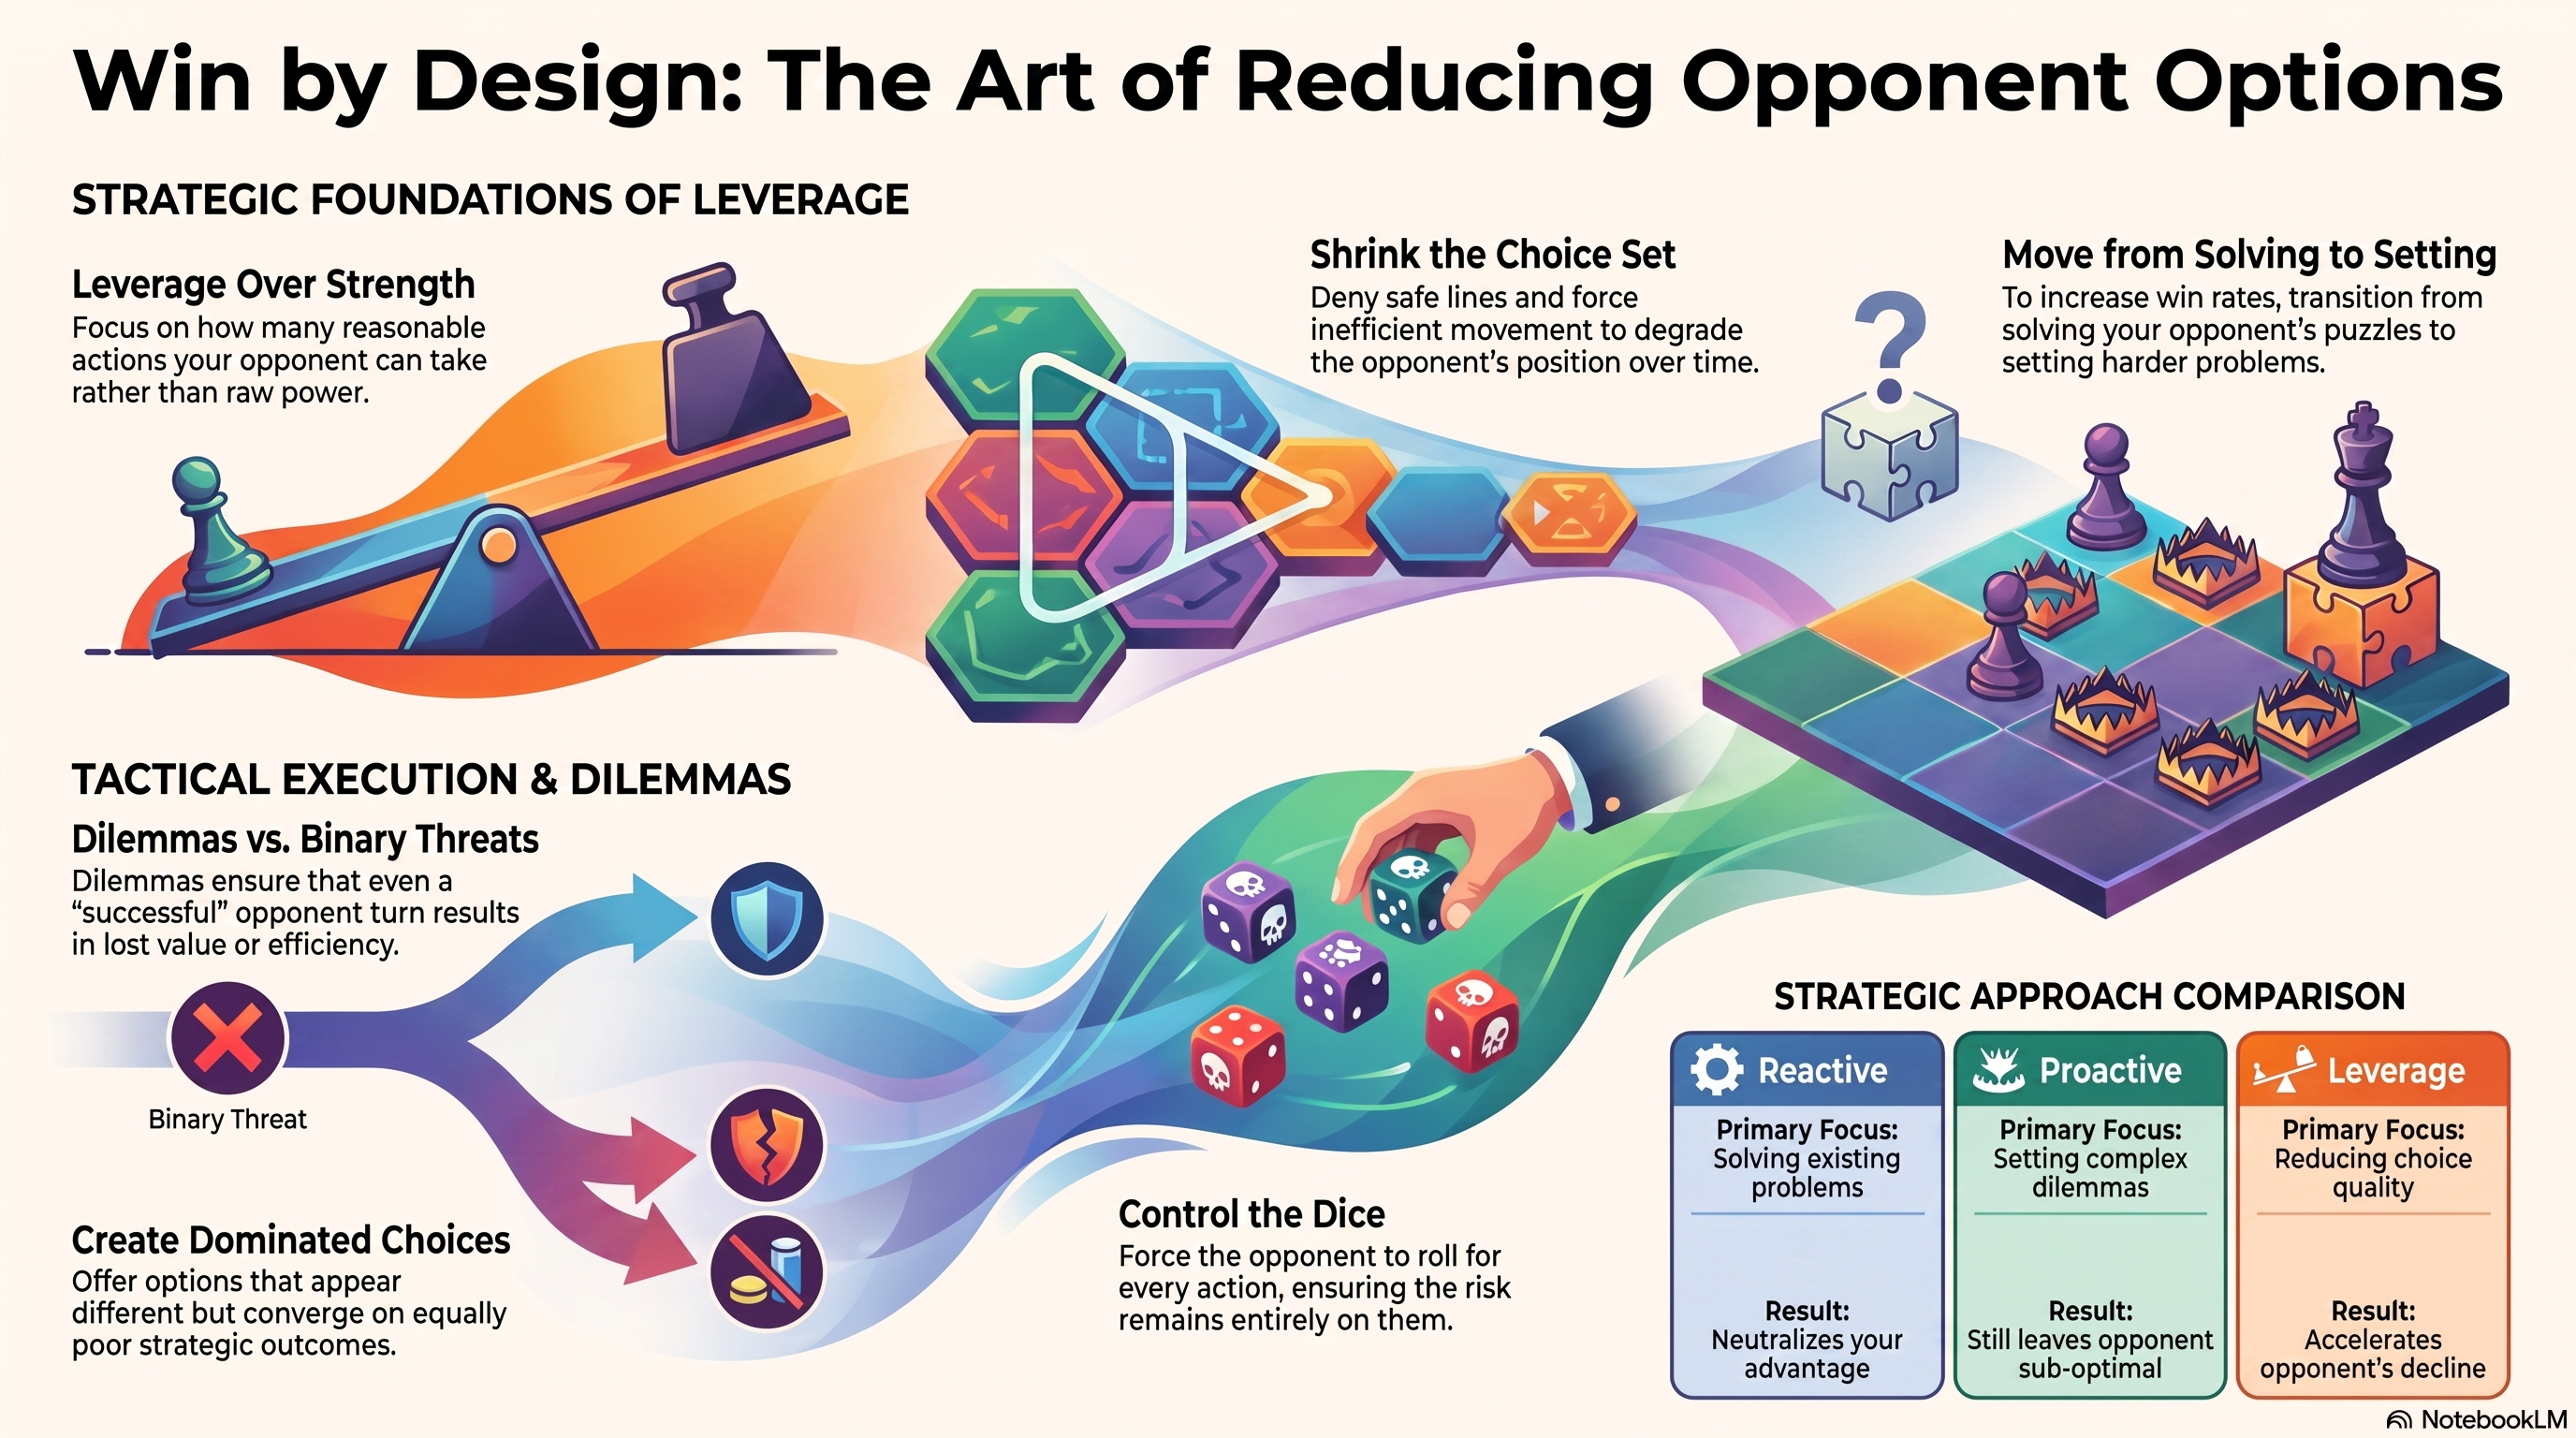

Controlling the choice set is the process of restricting an opponent’s access to efficient actions. Sometimes this is achieved by removing options entirely. More often it is achieved by degrading the value of the remaining options, forcing dilemmas, dominated choices, or additional risk.

TLDR
- Strength comes from shrinking your opponent’s choice set: deny safe lines, force inefficient ones, let them roll the risky dice.
- Dilemmas beat threats: create situations where solving one problem worsens another line, so even “successful” opponent turns lose value.
- Control the dice they must roll: repeated forced risks (dodges, rushes, high fail state blocks), compounds into positional collapse without you gambling.

Reducing Options Versus Solving Positions
Blood Bowl is a problem-setting and problem‑solving exercise. While learning the game, and playing against better opponents, you naturally experience more problem solving than setting. To move upward in win rate, you need to set harder problems.
What that means in practice is developing ways of reducing the quality of the opponent’s available decisions. At high levels, you won’t get easy chances from misplays. What we need is compounding pressure that creates opportunities.
In game‑theory terms, strength is less important than leverage
Controlling the choice set means focusing on how many reasonable actions the opponent can take on their turn and then denying the best option(s) or reducing how damaging they would be to your position. The simplest of examples (that you are almost certainly already doing), is tucking away your tackle mb blitzer behind a screen after they’ve delivered their blitz. By so doing you have denied the opportunity to hit your damage dealer. Simple.
On a broader, more conceptual standing, a defence that cedes a safe dodge or a comfortable blitz may grant the opponent too much freedom. It is not unusual to hear top-level commentators talk about “gaping holes” where a single action gives up lots of space. By contrast, a position that forces the opponent to choose between risky rolls, inefficient movement, or abandoning objectives or, as discussed in part 4, committing early can degrade their game Expected Value turn after turn.
Forcing Decisions and Creating Dilemmas
Controlling the choice set can involve constructing dilemmas (or trilemmas, quadlemmas) rather than single threats.
Note that forcing dilemmas differs from direct aggressive play that seeks decisive rolls. A cage-diving blitz aimed solely at sacking the ball is binary: it works or it does not. Ideally the dilemma is a situation where addressing one problem necessarily worsens another problem.
There are times in the game where you have to go for the binary play, but if your whole game plan is to roll well you become slave to the dice.

Example
We often gently mock a base-the-ball strategy… “ball based = game over”… as, usually, these are an easy to solve problem. However, basing the ball is an easy to visualise example. So, let’s use it.
When a ball-carrier is based you can create a di or trilemma; your opponent could 1) blitz off the basing piece, or 2) blitz elsewhere and dodge off, or 3) block the basing piece but don’t advance. The blitz-off option is usually the safest option but it means your opponent isn’t blitzing elsewhere and so may struggle to generate forward motion (assuming your other pieces are appropriately controlling the space). Whereas the dodge has a tail-risk of ball down. If you’ve also made it such that they need to do a number of rolls to clear the route for the ball carrier, then you might be generating a situation where either option isn’t great.
The reason we sometimes mock the base-the-ball strategy is that if it is done in isolation and early in a drive it doesn’t create this sort of dilemmas. Punching the basing piece becomes an opportunity rather than a threat.

Basing the ball is clearly a simplified example, but the underlying principles hold true as the situations become more complex.
Building on the commitment theme from a previous post, a dilemma could be:
- Option 1 to offer more space if your opponent chose to blitz through a weaker edge piece. However, if they took that route, it would force commitment to a push down the sideline.
- Option 2 to take less space and forward momemntum, but stay central and flexible.
Other examples are “using up activations”; selectively basing players of your opposition to force them to choose between putting assists in and taking the blocks but giving up momentum through lack of forward movement, or finding a way to free the players (dodging, blitzing or chaining them free) that involves taking on riskier rolls.

The power of using dilemmas lies in that they do not require the opponent to fail a dice roll for advantage to accrue. Even successful resolution of one branch is still sub-optimal in some way.
Over successive turns, forced inefficiencies stack, leading to attrition of position, rerolls, or time.

Dominated Choices and the Illusion of Freedom
A dominated choice is an option that is worse than another available option in all meaningful outcomes.
In Blood Bowl, dominated choices arise when positioning or marking makes certain actions technically possible but strategically indefensible. An opponent may still choose them, especially under pressure, but doing so accelerates their decline. Creating dominated choices is one of the most reliable ways to convert positional pressure into long‑term advantage without relying on dice.
A dilemma forces a meaningful trade-off. A dominated choice offers only the illusion of a trade-off. The illusion of freedom is particularly powerful psychologically. Players resist the feeling of being forced, and will often choose an inferior action to preserve a sense of agency.
This tendency can be exploited by offering options that appear different but converge on equally poor outcomes. Importantly, this does not require deception. It requires clarity about which opponent resources matter and deliberate denial of efficient use of those resources.
Example
Let’s frame this in another obvious example that you are already doing. Consider an opponent who has a single Tackle* piece. If your defence relies heavily on Blodge, that player represents a disproportionately valuable resource. Marking or isolating the Tackle piece means that although the opponent can still activate it. They can dodge away, block with it, or commit their blitz to freeing it. However, every use is now less efficient than simply applying Tackle where it matters.
The opponent retains freedom of action, but the most valuable use of a critical resource has been denied. What remains are dominated choices. They can spend their blitz freeing the Tackle player rather than attacking a target. They can leave it marked and attack elsewhere with reduced effectiveness. They can attempt risky dodges to reposition it. None of these outcomes extracts the value they wanted from the piece or adds an extra element of risk.
*Tackle here could be Frenzy, a Big Guy, Stand Firm, Side Step etc in different contexts.
The objective is often not necessarily to remove a resource entirely (although it would be nice to kill that Tackle piece), but to separate that resource from the purpose for which it is most valuable.
Controlling which dice are rolled
Whenever you force the opponent to roll to execute even their best response, you gain leverage without committing variance yourself. If you do this correctly, it is different from passive play. It is an active choice to let probability work on your behalf. As usual, you know and do this already. You know that forcing an opponent into non-profitable dice (dodges, rushes, and low odds blocks) is a good thing!
The perspective of using probability as one of your tools reframes decisions in defence, screening, and marking. The goal is not to eliminate all risk, but to ensure that risk is borne by the player who can least afford it. Repeatedly forcing the opponent to roll before they can improve their position is one of the most reliable ways to convert advantage into victory.
Connecting to other Game Theory Concepts
Commitment and choice-set control are closely related. Commitment narrows the opponent’s future options. Choice-set control then degrades the quality of those remaining options. Together they transform positional pressure into strategic advantage long before any critical dice are rolled.

Personal Development
Reflection
I’m not sure whether I’ve already said this, but I envisage these review sessions being a discourse between players looking to improve. Use your opponent’s perspective to look at decision points and talk through what went into the decision. In review, identify moments where you or your opponent made a choice that felt “wrong” (to either player), and assess whether the positioning had already rendered all available options unattractive. Did they have to make that wrong choice.
If reviewing on your own, focus part of your evaluation away from how strong your position looks and instead focus on how your play constrained your opponent’s next turn. Play both sides of the ball for each turn and identify areas where your opponent’s options were not constrained, and whether any tweaks could be made to improve.
I’ve not tried this, but I think there could be value in rating your defence in terms of the number of “meaningful” dice your opponent had to roll and vice versa. Amongst all the other noise of removals, events, ball location etc this won’t tell the whole story, but the simple concept of having a semi-objective measure of how effective a defence was could be a good starting point for deeper analysis of what went right.
Practice
During games, practice asking what the opponent’s best reply is and whether you would be happy to face it. The obvious starting point for this tweak is the decisions you are making with the final few pieces after the main thrust of the turn has happened. However, ideally you want to move to doing this analysis before the turn plays out.
Practice constructing turns around paired threats rather than single objectives. When planning a turn where you will set a dilemma, look for the solutions to that question and ways to make both solutions sub optimal, even if it’s just committing one opponent piece out of position or forcing an additional dice roll. Learn to recognise when an opponent’s apparent options are functionally equivalent in outcome, and aim to produce such situations deliberately.


Leave a Reply