
Sideline dive
Let’s explore the easy one first; the Blitzer using his Breaktackle to dodge into the sideline to hit the ball carrier Ghoul.
All this needs is to cancel the Skeleton A assist, which the free Thrower could do, standing in front of the Wight.
Before doing that, you likely would take both BU hits on Zombies B and C and likely move one of the free Linos, probably to NE of the Blitzer. You might choose to not do this as he’s a recovery option if things go amazingly well. The other lino you could dodge and rush around the back to tag the Zombie D. I’m not sure you’d want to commit RRs to the dodge but possibly yes to the rushes. If that works, the dive is much more appealing
The dive itself is a simple 5+ down to 4+ with breaktackle, 75% with RR. You then rush for 1D on the ball (needing a pow). Including the 322 previously, you would be about 3% to get the pow without RR, 10% with 1RR, 15% with 2RR.
if no pow you would have to take the frenzy second hit (another rush) which would also be 1D if you made it around to tag the back, or would be -2D.

I’d be assessing each roll as I went with this sort of play; you are committed after first hit so it’s 13% from there for the rush/1D without RR, 27% with one RR. Whether you put in the RR depends on how many you spent up to that point and what you rolled on the block… it might be preferrable to fail the rush or skull the 1D than be surfed.
And that’s the problem with this.. what if it doesn’t work.
With a failed dodge the position is something like below.

Guard Wight could hit the Thrower and follow. Skele A steps forward on square and Ghoul can either score or set up on near the goal line in safety. The mummy then hits the guard lino and follows and we can free the zombie D with a Ghoul 2D to close off the cage. Best case scenario for the Orcs is they are diving again next turn for more pow fishing.
If the Blitzer makes the dodge but doesn’t get the Ghoul down (2x 1D needing pows = 30%, then its a decision about how many of those to RR to take it to ~45%). The fact that the Ghoul has side step is also a problem here as he can step back and then in if just pushed.
If the Ghoul isn’t down, it’s an instant surf of the Blitzer with 2D with wrestle zombie. If he is down, then you are hoping for a lucky scatter going through all the other pieces into the open. Could happen, but more likely is it ends up somewhere easy to still surf the blitzer and recover into a safeish cage.
As the undead player I wasn’t too worried about this option tbh.
Elaborate chain push for 1D
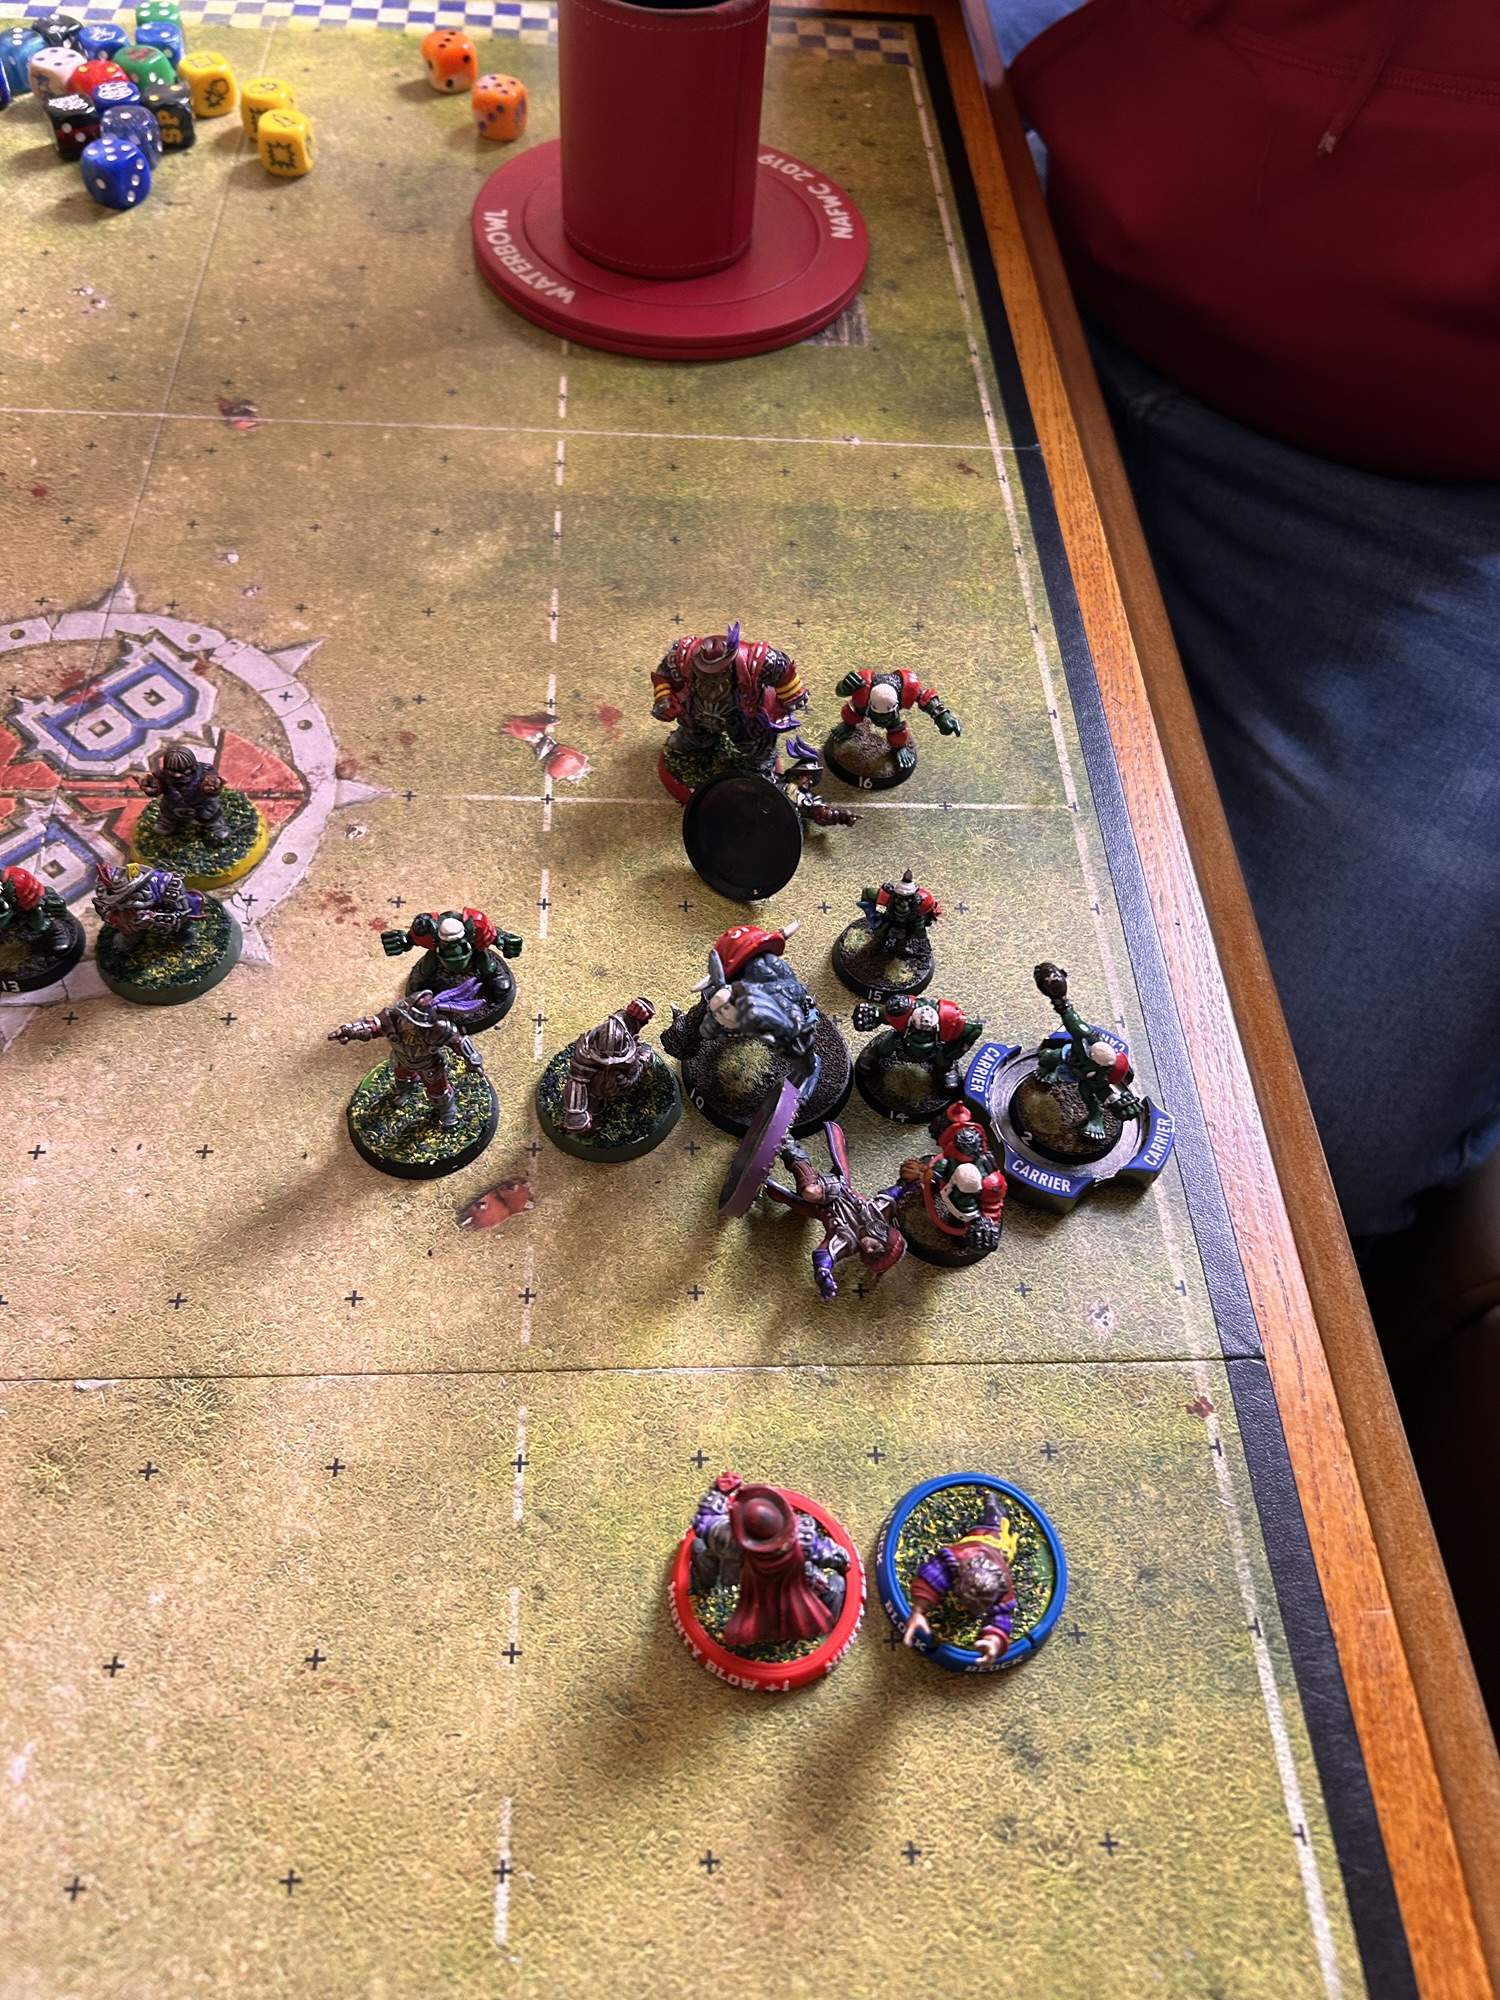
This is the reason I took the pic and why this exists as a puzzle. It doesn’t mean this is best choice, but let’s have a look at what else we could do.
Thought process: The block lino #1 can be chained two squares over to hit the ball. That would be relatively easy just fill in behind zombie B to form a T and to the E of Lino 3 to for a second line and then frenzy blitz into the top and 2 sets of pushes et voila. But. The Guard wight means that the ball carrier hit will be a -2D looking for double pows (3%).
So we need to move the guard wight too. That means one of the frenzy pushes will need to advance lino 3 to hit the Wight. I did say elaborate.
Stage 1, Lino 4 3/2/2 around the back as previously, but ending up next to the Mummy, we’ll need him later… You could delay this if you wanted to see if other stuff worked first.
Lino 5 fills in next to the Mummy, and Thrower sits behind the BU. I prefer this way, as if other stuff goes wrong it means the lino takes the MB hit rather than the Thrower. Lino 2 then 3+ dodges out and steps next the Wight. This is a decent position for him anyway.

Next we put on our big boy pants. The Frenzy Blitzer blitzes Zombie B doing a 4+ dodge (with breaktackle) in to get the angle to 1D push N into Lino 5 and chain him NW into Lino 1 who is pushes NW. We need a push (1/3 = 5+) on top of the dodge.

The Blitzer then rushes for his second frenzy hit this time chaining into Lino 3 pushing him NW ready to hit the Wight. Again we need a push on a 1D (5+)

At this point you are looking at the position and saying, you’ve already rolled a nonsense amount of dice and you haven’t even got the last push. The good news is that we kept out big boy pants on and are fine with dodging the BO over near Zombie C and rushing him around into the spot where the blizer left from. 4/2. Easy.
From there, the other BU punches Zombie B into lino 5 into lino 1 chaining him next to the ball carrier and after that we punch the Wight with lino 3 and follow up the block.

Happiness. 1D on the ball carrier needing a pow!
Let’s recap 3/2/2/4/5 /2/5/4/2… 2D (push/pow), 2D (push/pow)… 1D pow.
Yes, not likely. 0.7% to get to the final hit, 3/7/10.5% with RRs. To get everything including the final pow would be 2.7% with 3RRs. And no recovery.
I did say it wasn’t the best option. But the glory.
Realistically the most likely early fail point is the two 1Ds needing pushes. If you rolled a pow or both down on either of those you are fine and pivot to an all-in stance. If you fail the dodges or rushes it is a very easy stall and score for the Undead on 8. If you get as far as next to or hitting the ghoul, likely the Undead still score but probably on T7, giving you a 2 turn. So, not great but the EV isn’t as low as it first looks.
The Dusher solution
Dave didn’t think attempts at the ball would be effective here. Instead he elected to use his Orcs like Elves and screen. You can watch him puzzle out how best to set that up and the turn ordering in the video of the live stream. Don’t worry, the link below should take you to the exact moment, you don’t have to watch the whole game.
Dice required were: 2x 2D hits with Block BUs on Zombies with the Black Orcs first (getting 2 removals). Rush lino x2, Rush lino x 2, Dodge downed lino 3+, -2D Blitz on Mummy (w/block, looking to run away but didn’t dodge after pushes), Dodge 3+ Lino. 14% not to need a RR, 37/55% with 1/2 RR put in.

The one mistake I think you can see here in the final position is following up with the BU on the right has created a big hole that the dodge wight could run through. On my next turn I cleared Lino 1 with the Mummy then blitzed through Lino 3 and formed an X cage just beyond the linos. 2x2D hits and 3 rushes total, with 3RR available.
He could/should have Blitzed with that right BU and used it further back as part of the screen, which would have made things pretty hard.
What I would do.
Dave and I play situations like these differently.
Faced with the same situation I don’t go for the ball using either routes. As Orcs, I’m thinking I win this game through any of three routes i) get the stop, ii) force the score in 7 and score my 2 turn and iii) win over 24 turns with my 5x MB firing off and winning the attrition war (it was a final).
Like Dave I take the two BU hits (and get the Undead to 7 on the pitch). I don’t follow the second one though so the BU are connected. But after that, I look to control activations with my 7 non activate players vs the Undead 7 players.
Dodge Wight gets Lino 5 as a friend, Lino 2 stands, Lino 4 rushes to tag the Guard Wight, Thrower blitzes the Guard Wight pushing toward the sideline or powing downward, and follows. Blitzer swings around to tag the skele. Lino 3 stays on the Mummy. Lino 1 (Block Guard) considers a last action dodge around the sides depending on how things have gone and whether I’ve burned RRs.

Something like the above. Now its the Undead who need to wear their big boy pants. They can score relatively easily with a few critical blocks which need to be pows into block pieces, and likely would end with a 3+ through a gate dodge, I don’t think there is an easy to stall from there.
Who’s to say what’s right and wrong?
There’s not one solution and mine is different from Dave’s in two ways. Yes, I control more activations and force critical rolls. BUT I also give up more hits, take more risk. The Thrower and the Blitzer are both getting hit next turn as well as 2 linos. The Orcs apo is gone and this could be a 24 turn game. Losing either positionals would swing the EV of the drive back toward the Undead (who, with 7 pieces, are struggling right now… 2 sets of KO rolls could help that though).
Why bother with the puzzles?
Good question. I like these as exercises as they reinforce pattern recognition. I took the photo as I knew that there could be a chance.
Being able to see multiple lines of play allows for choices to be made. As per our recent Game Theory post: Options have value. The end decision about what to do comes down to EV, variance and tail risk, all topics we’ve covered previously in the game theory I, II and III.


Leave a Reply