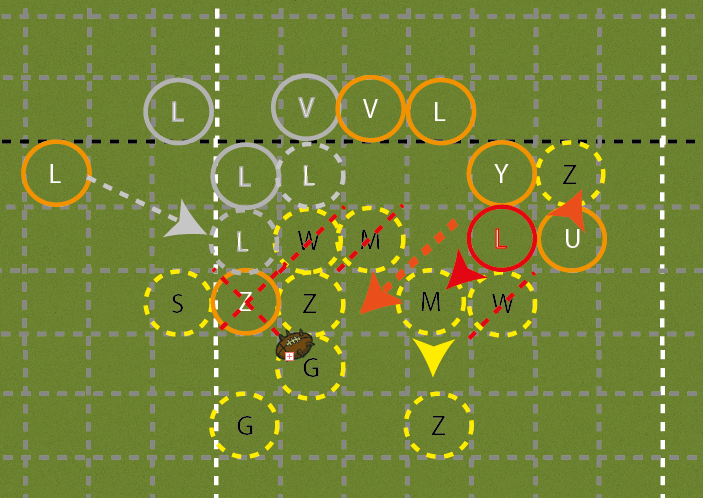
Risky plan… instead of using the ready-made Zombie box, we can make our own. Same first actions, lino up and 2D the wight, but now put him (up or down) next to the rear Mummy and follow in; indeed, this is a branch point that could change depending on the first block dice. Then move one of the wide Linos in to fill the box by standing next to the front Mummy. This leaves a 1D for the lino to hit the Mummy on the angle. We need a Pow here (33%/55% with RR). If no pow, then we revert to containing the position, the chance is gone.
With a pow, it’s on! We chain the rear Mummy onto the back corner of the Zombie/Yhetti box (*red outline).
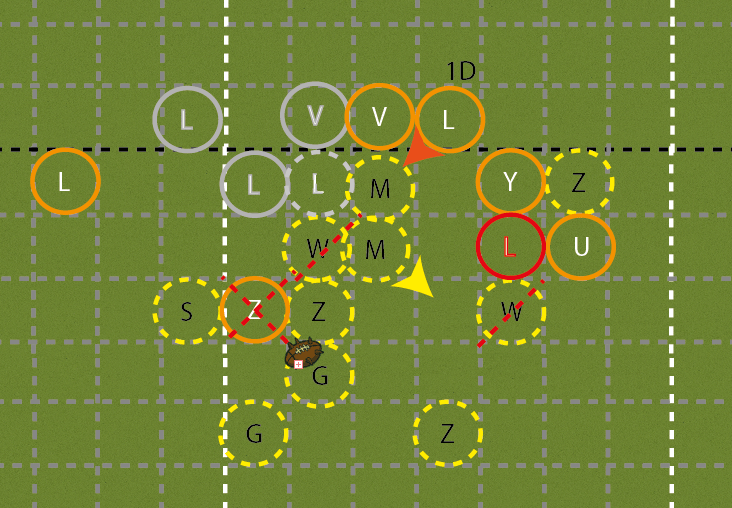
Now we have a -2D on the Mummy. This only needs pushes or better (69%/90% with RR), pushing them downwards. The Ulf clears the Zombie in contact with The Yhetti and the free lino or Valk* tags out the front Zombie.
Then it is time for the big lad to get the job done; Yhetti 2+, 2D into 2D with his frenzy onto the Ghoul, ~25%/46% to find a pow including the negatrait roll. If he gets the ball down, the Yhetti is touching the other Ghoul and Skeleton. At this point either the free Lino or Valk, whichever wasn’t used to tag the Zombie can try to collect it if available. Even if the ball doesn’t go down, the Undead player has quite a problem to solve… their position has collapsed.
*You could also -2D with the Valk instead of the Yhetti. -2D with strip ball puts the ball on the ground 44%/69% with RR which is better than Yhetti odds of ball down. Indeed, If the hit with the second lino on the Mummy puts the Mummy down (25%), the Valk hit becomes 1D and almost certainly the better choice. (In this specific case though, the Ghoul has sure hands, so the Yhetti is better)
Is this play better for getting the ball down?
2D on Wight needing pushes (88%), 1D on Mummy needing pow (33% have to RR to 55%), -2D on Mummy (69%/90%), Yhetti frenzy 2D/2D. Overall about 5% for ball down without RR, but rising to 15% if you can put one RR in and to 22% with 2RRs. So, if you need the ball down and are willing to put in the RRs, then yes it is better.
But
The fail state is much worse. Same opening 2D, then 1D with block (1/6) compared with 1/9 for the blockless Valk blitz, then -2D (31% (11/36) vs 3D Yhetti (1/27). There’s an easy blitz for the Undead through the left lino and restabilise or sideline screen. Importantly, the risky rolls are quite early in the sequence.
They do have other benefits though; they push Mummies back and hopefully down, so if you did need to revert to a containing or pressure turn, the position is stronger. The Undead have a lot of work to do. You might see the Ghoul’s potatoing off down the left if you try this line, but at least one Valk and some of the linos should be around to cover.
Game Theory Comments
We have 2 ball-sacking lines and we have lots of other options of defensive shapes and pressure we could bring. How to decide what to do? There’s more to the decision than the straight odds. Indeed, it is quite hard to work out the overall odds on the table and even harder to fully predict the effect of the less dramatic lines.
In Game Theory terms we need to consider the effect of the choice on the whole game outcome (Expected Value and Variance).
If you were the Norse and losing, then the higher variance option 2 play increases the chance of putting the ball down at the expense of a wider distribution curve. There are more likely failures earlier in the turn sequence. In a losing situation, a more passive containing line might not do enough in a situation where the opponent doesn’t need to score. Option 1, gives you a chance, but maybe not enough compared with option 2 (it does depend on the turn number etc here).
In contrast, if the Norse were winning and needed to win, then option 1 is lower variance, your position doesn’t collapse on an early failure. Even if you don’t get the ball, the actions are quite good in terms of destabilising the position, so the overall effect is likely not much worse than a non-sacking line (EV neutral).
However, if you are winning and need to not lose then a containing turn might be the better line. Not committing to the sack could allow you to establish a position that would more effectively slow the drive down, ensuring that any score would come late (if at all).
In a team situation, this less aggressive “not lose” line might be what your team needs most.
What actually happened?
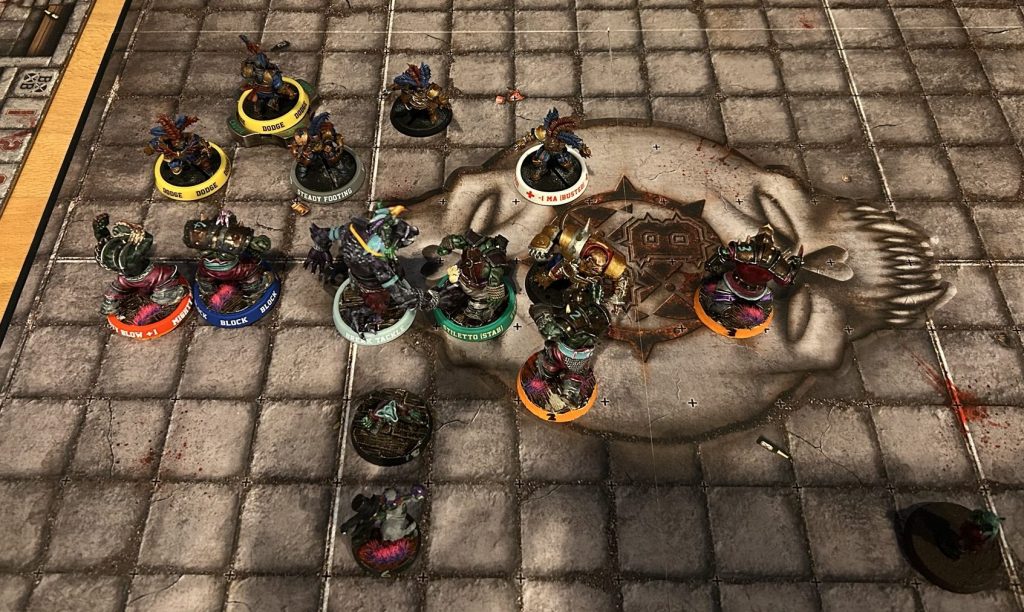
This puzzle came from a playoff match where I was playing as the Undead and was losing 1-0. This was middle of the second half. My opponent had 2 RRs remaining, and he chose not to go for either ball sack options, instead played a more pressure increasing but no sack attempt line. The Yhetti 3D’d the zombie, the Ulf blitzed the rear Zombie and based the ball carrier and the others punched and repositioned to stop the advance. Absolutely reasonable. My position was pretty horrible afterward. It forced some big dice rolls to restabilise and burned some game clock, which in a turn or two meant a multiple rushes were required to get in scoring range. I did eventually score on T16 and take it to overtime, but that doesn’t mean it was the wrong decision!
And finally
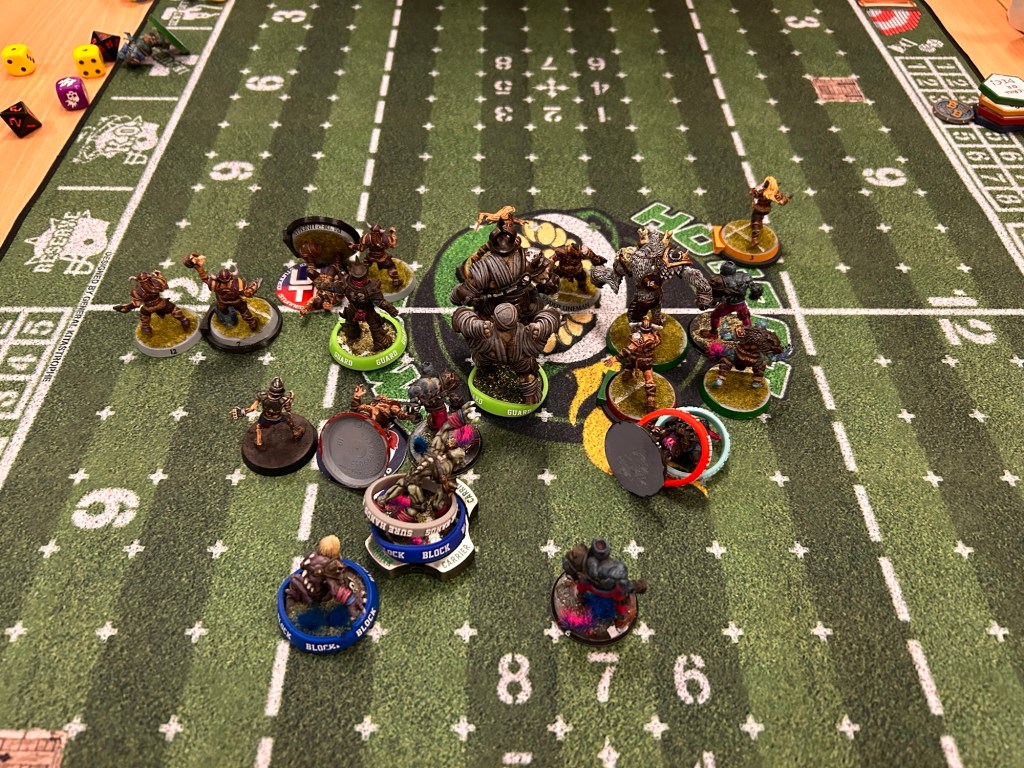
I took the picture of this board state as I could immediately see that with based players in multiple locations there would be a chance to do something interesting and I wanted to consider after the game what I would do.
Embedding pattern recognition of boxes, Ts and therefore seeing chances quickly moves the decision point on from using your time for “spotting an opportunity” to “deciding between different opportunities”.
Like BB puzzles?
Check out this page of Youtube videos from BB3 games and/or subscribe to the blog for the next instalment.

Leave a comment